In this tutorial, we show you how to use any audio from your track to make an ambient pad that sits nicely in your mix, and feels integrated into your song.

Step 1: Source your melodic content
If you are creating this pad for a particular song, it’s best to use a sample that is in the same key. I like this method because you can use existing elements of your track to make it while giving it a very cohesive and organic feel.
Step 2: Time-stretching your sample
- Drag your sample onto the timeline.
- In clip view, change it’s warp mode to complex and double it’s tempo twice.
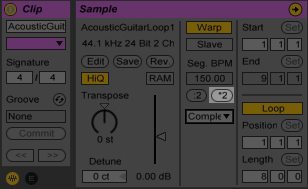
- Once you do this, consolidate and repeat these steps to double its tempo x4. Don’t forget to set your warp mode to complex after you consolidate.
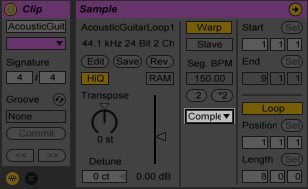
Set warp mode to complex
Double the time here
Consolidate to double again
Step 3: Add effects
Width: Widen your pad using the Haas effect or any other. Check out Mr. Bill’s great tutorial on how to do this.
EQ: Cut out harsh frequencies and bring out frequencies you like
Delay: Create space and build up of harmonics
Reverb: Soften and smooth the sound while giving dimension
Compress: Bring out all the work thus far and tame the dynamics
Reverb: More space!
Multi-band Compression: Tone and tighten everything
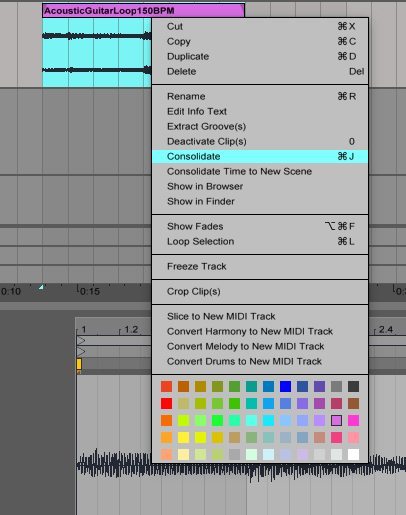
Step 4: More control
- Create a new midi track
- Drag your pad into it, this will create a simpler
- Then right-click and Simpler -> Sampler
- Adjust release mode and crossfades
Sampler opens up a wealth of manipulation opportunities
Step 5: Get Creative
Try adding phasers, Chorus, Auto-pan and other effects to give more movement to your pad.
Sorry, but you have already liked this article.